How to Paint Kitchen Cabinets: The Complete Step-by-Step Guide for a Professional Finish
If your kitchen feels tired, dated, or just plain dull, painting your cabinets is one of the single most impactful upgrades you can make without the cost of a full replacement. Done right, freshly painted cabinets can transform a kitchen so dramatically that guests assume you gutted the whole room. Done wrong, you get peeling, brush marks, and regret.
This guide walks you through how to paint kitchen cabinets the right way start to finish so you get a finish that holds up for years. Whether you are a confident DIY homeowner or just exploring your options before calling in a professional, everything you need to know is right here.
AtSH Design Woodcraft, we work with homeowners across Middle Tennessee who are ready to give their kitchens a serious upgrade. We have seen hundreds of kitchens, and we know exactly where the process goes wrong and how to make sure it goes right.
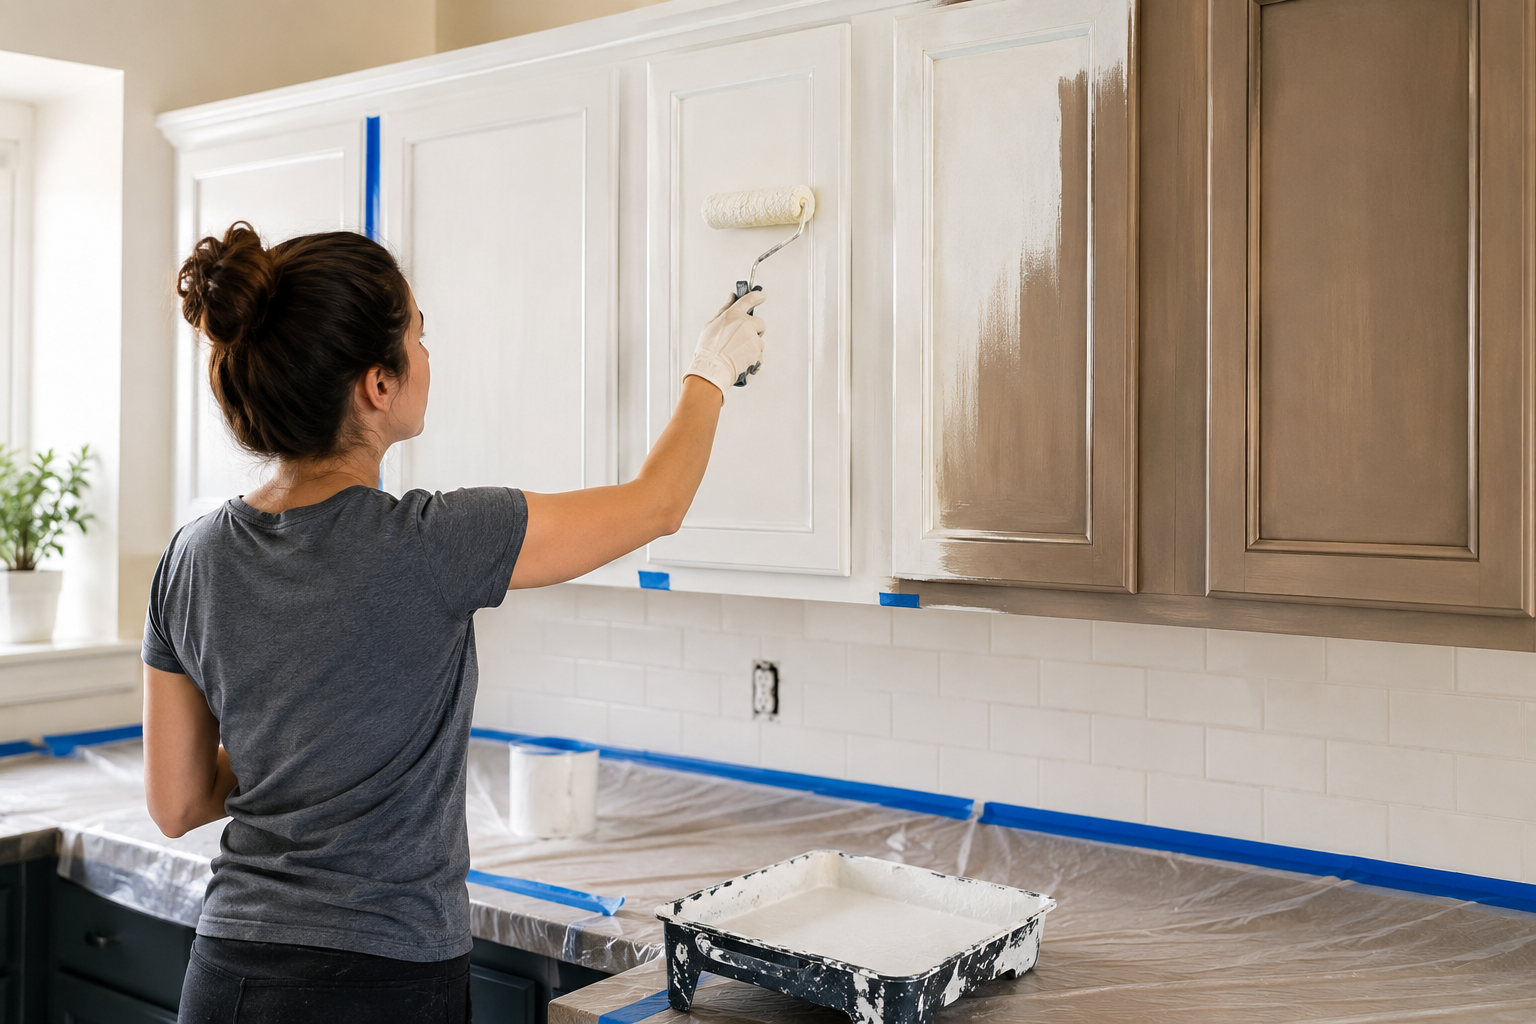
Before You Begin: What to Know About Painting Kitchen Cabinets
Painting kitchen cabinets is not a weekend whim project. It takes time, patience, and the right materials. Most failed DIY cabinet paint jobs come down to three things: skipping prep, using the wrong products, or rushing the dry time between coats. If you are going into this with realistic expectations, you are already ahead of most people.
The process typically takes three to five days from start to finish when done properly, depending on how many cabinets you have and how many coats you apply. Trying to compress that timeline is almost always what causes problems.
It is also worth thinking honestly about what you are working with. If your cabinet boxes are structurally sound and your doors are in decent shape, painting is a smart, cost-effective choice. If your boxes are water-damaged, warped, or poorly built, paint will not fix the underlying problem. Our post oninexpensive kitchen remodel ideas covers this decision in depth if you are weighing painting against a broader refresh.
How to Prep Kitchen Cabinets for Painting
Preparation is where the real work happens. A great finish depends almost entirely on how well you prep the surface. Most professional painters will tell you that 70 percent of the job is prep and they are not exaggerating.
Step 1: Empty and Label Everything
Remove all doors and drawer fronts. Number the inside of each door and the corresponding opening so reassembly is effortless. Remove all hardware hinges, knobs, pulls and store everything in labeled bags.
Step 2: How to Clean Kitchen Cabinets Before Painting
This step is skipped more than any other, and it is the most important one. Grease, cooking residue, and grime build up on kitchen cabinet surfaces over time. Paint will not stick properly to a dirty surface, period. How to clean kitchen cabinets for painting: use a degreaser like TSP (trisodium phosphate) or a strong dish soap solution and scrub every surface that will be painted. Pay extra attention to the area around the stovetop. Rinse thoroughly and let everything dry completely before moving on.
Step 3: How to Prep and Paint Kitchen Cabinets Sanding
Sanding creates mechanical adhesion it gives the primer and paint something to grip. For previously painted or finished cabinets, 120 to 150 grit sandpaper is usually the right starting point. The goal is to dull the surface, not strip it down to bare wood. After sanding, wipe everything down with a tack cloth to remove dust.
How to sand kitchen cabinets for painting: always sand with the grain, use a sanding block for flat surfaces, and use a detail sanding sponge for profiles and grooves. How to sand and paint kitchen cabinets properly means never rushing this step it is the foundation everything else sits on.
Step 4: Fill Any Imperfections
Wood filler or spackling compound can address small dings, nail holes, and minor surface imperfections before priming. Apply, let dry, sand smooth, and wipe clean.
Step 5: Prime
Never skip primer on kitchen cabinets. A shellac-based or oil-based primer is strongly preferred over water-based because it blocks tannins, sticks to previously finished surfaces better, and provides a harder base for the topcoats. Two thin coats of primer almost always outperform one thick coat.
How to prepare kitchen cabinets for painting correctly always ends with a properly primed surface this is the step that separates lasting results from early failures.
How to Paint Kitchen Cabinets Without Sanding
This is one of the most searched questions around cabinet painting, and the honest answer is: you can, but with important caveats. Liquid deglosser products chemically etch the surface to create adhesion without mechanical sanding. They work reasonably well on surfaces in good condition with a light existing finish. They are not a substitute for proper sanding on thick, glossy, or heavily finished surfaces.
If you are going the no-sand route, use a high-adhesion primer immediately after deglosser application the window is usually 30 to 60 minutes. The paint system still needs to be correct, and the surface still needs to be completely clean and dry.
How to paint my kitchen cabinets without sanding and still get a durable result means being ruthless about product quality. Do not cut the paint budget just because you saved time on sanding it is a trade-off, not a free pass. For how to paint old kitchen cabinets that have multiple layers of old paint, sanding is nearly always necessary regardless. Liquid deglosser alone is not designed for multi-layer paint removal.
How to Paint Kitchen Cabinets Professionally
The difference between a DIY result and a truly professional finish usually comes down to two things: the application method and the paint quality.
Use the Right Paint
For kitchen cabinets, alkyd (oil-based) or waterborne alkyd paints are the professional choice. They level better, dry harder, and hold up to the cleaning and daily abuse that kitchen cabinets face. Brands like Benjamin Moore Advance, Sherwin-Williams Emerald Urethane Trim Enamel, and Behr Alkyd Semi-Gloss are widely respected. Avoid standard latex wall paint it does not cure hard enough for cabinetry.
How to Spray Paint Kitchen Cabinets
Spraying produces the smoothest, most professional-looking finish. An HVLP (high volume, low pressure) sprayer is the tool most professional painters use for cabinet work. How to paint kitchen cabinets with a sprayer: thin the paint slightly per manufacturer instructions, apply in thin even passes with the gun held 8 to 12 inches from the surface, and keep the gun moving at all times to avoid drips. Proper masking of the entire kitchen interior before spraying is non-negotiable overspray travels farther than people expect.
How to paint kitchen cabinets with sprayer technique takes practice. If you have never sprayed before, run test passes on cardboard until you have a feel for the trigger and distance before touching the cabinets.
Brush and Roller Application
If spraying is not an option, a high-density foam roller for flat surfaces combined with a quality 2-inch angled brush for profiles gives the best brush-and-roll result. Roll the large flat areas first, then tip off the surface lightly with a dry brush in the direction of the grain to reduce roller texture. This is how to paint kitchen cabinets without brush marks when spraying is not available.
How to paint kitchen cabinets like a pro without a sprayer comes down to patience thin coats, full dry time, and light sanding between coats. Two to three topcoats are typically needed. How to professionally paint kitchen cabinets always means multiple thin coats rather than one thick one.
How to Paint Kitchen Cabinets White
White is by far the most popular cabinet color, and it is also one of the more demanding finishes because every brush mark and uneven coverage area shows clearly.
First, bleed-through from wood tannins especially on oak can turn white paint slightly yellow or pink over time if an oil or shellac primer is not used. Second, white paint requires thorough consistent coverage; three coats is common with proper dry time and light sanding between each. Third, a semi-gloss or satin sheen is generally recommended for white kitchen cabinets because it is easier to wipe clean without dulling.
How much to paint kitchen cabinets white professionally tends to run slightly higher than painting them a mid-tone colour, because the additional coats add labour time. DIY-wise the material cost difference is minimal just budget for that extra coat.
When thinking about how to paint kitchen cabinets white, the wood species underneath matters a lot. Maple is the easiest because the grain is tight and consistent. Ourbest wood for kitchen cabinets guide explains exactly why maple outperforms oak and cherry for painted finishes a worthwhile read before you commit to a colour.
How to Paint Stained Kitchen Cabinets
Stained cabinets require an extra step because the stain and clear coat create a slick surface that paint bonds to poorly without proper prep. How to paint stained kitchen cabinets: sand thoroughly with 120-grit to break the sheen, wipe clean, apply a shellac or oil-based primer in two thin coats, and proceed with your topcoat system. Do not use a latex primer directly over stain the adhesion will be poor and you will likely see peeling within a year.
How to paint kitchen cabinets that are stained with a heavy dark stain benefits from a tinted primer tinted toward your topcoat colour to reduce the number of finish coats needed for full coverage.
How to Paint Wood Kitchen Cabinets Including Oak
Wood cabinets particularly how to paint oak kitchen cabinets come with one specific challenge: open grain. Oak has a pronounced grain texture that telegraphs through paint, giving a textured look rather than the smooth finish most people want. The solution is grain filler.
Apply a grain filler with a putty knife or coarse rag, working it into the grain, then sand back smooth once dry. This fills the open pores and gives you a smooth substrate for primer and paint. Without this step, how to paint wooden kitchen cabinets or how to paint wood kitchen cabinets particularly oak will almost always result in a visibly textured finish no matter how many topcoats you apply.
How to paint oak kitchen cabinets and get a result that looks like maple: grain filler, shellac primer, light sanding between every coat. It takes one extra day but the finish difference is dramatic.
How to Paint Laminate Kitchen Cabinets
Laminate is a non-porous surface, which makes adhesion the central challenge. How to paint kitchen cabinets that are laminate: lightly sand with 180 to 220 grit (just enough to scuff the surface without going through the laminate layer), apply a bonding primer formulated for slick surfaces, and allow full dry time between coats.
How to paint kitchen cabinets that are laminate with a lasting result means avoiding oil-based topcoats they tend to crack on flexible surfaces over time. A waterborne alkyd in semi-gloss or satin is the better choice. This is one of the more technically demanding surface types and getting the product selection right matters more here than almost anywhere else.
How to paint IKEA kitchen cabinets follows the same approach most IKEA cabinet surfaces are thermoplastic foil or melamine, which are essentially laminate. Bonding primer is the key step that makes or breaks the job.
How to Strip Paint From Kitchen Cabinets
Sometimes you need to start over completely. How to strip paint from kitchen cabinets: the two main methods are chemical strippers and heat guns. Gel-type chemical strippers work best for vertical surfaces apply, let dwell 15 to 30 minutes, scrape off with a plastic scraper. Multiple applications are often needed for thick paint build-up.
How to strip paint off kitchen cabinets near edges or in profiles: a detail scraper or brass-bristle brush after chemical stripping removes residue from tight spots. Always work in a well-ventilated area and wear appropriate PPE.
How to remove paint from kitchen cabinets using a heat gun requires more skill keep the gun moving constantly to avoid scorching the wood. After stripping, the surface needs sanding smooth before any new finish is applied.
How to remove paint off kitchen cabinets completely is worth the effort when the existing paint is peeling, bubbling, or cracked trying to paint over a failing surface always produces a failing result. For how to repaint kitchen cabinets that are already painted where the existing finish is still stable, you do not need to strip just clean, sand lightly, prime, and topcoat.
How to Paint Previously Painted Kitchen Cabinets
If your cabinets were painted years ago and the finish is stable no peeling, no cracking, no significant chips you do not need to strip. How to paint previously painted kitchen cabinets: clean thoroughly to remove grease and grime, sand lightly with 150-grit to dull the sheen, prime with a high-adhesion primer, and apply your topcoat system as normal.
How to paint kitchen cabinets that are already painted when the old paint is oil-based and you are switching to a water-based topcoat: a bonding primer is especially important to bridge the chemistry difference. Going from water-based over existing water-based also benefits from a primer coat for best adhesion.
How to Clean Painted Kitchen Cabinets
Painted kitchen cabinets are an investment, and proper cleaning keeps them looking fresh for years. How to clean painted kitchen cabinets: use a soft cloth or microfiber towel with warm water and a small amount of dish soap. Wring the cloth well excess moisture is the enemy of painted surfaces. Wipe in the direction of any grain pattern, and dry the surface immediately with a clean cloth.
For how to clean painted kitchen cabinets grease specifically around the stovetop a 50/50 mix of white vinegar and warm water works well for light build-up. For heavier grease, a diluted degreaser designed for painted surfaces handles it without dulling the sheen.
How to clean painted kitchen cabinets without removing finish comes down to avoiding abrasive scrubbers, harsh chemicals, and excessive moisture. Magic Erasers, while great on many surfaces, can dull a semi-gloss cabinet finish if used repeatedly.
How to clean painted cabinets in kitchen areas near the sink: dry the surface after every cleaning pass standing water pooling at the base of cabinet doors is one of the most common causes of paint failure at the edges.
How to Clean White Painted Kitchen Cabinets
White cabinets show yellowing and staining more readily than other colours. A baking soda paste applied gently with a soft cloth can lift staining without abrasion. Rinse and dry thoroughly. For regular maintenance, how to clean white painted kitchen cabinets is simply a matter of weekly wiping with a damp cloth before grease has a chance to build up.
How to Touch Up Paint on Kitchen Cabinets
Even the best paint jobs take chips and dings over time. How to touch up kitchen cabinet paint: the most important factor is using the original paint the same brand, formula, and sheen. Paint colours change subtly as they age, so a fresh spot touch-up with a new supposedly matching can often looks noticeably different under certain lighting.
How to touch up painted kitchen cabinets for small chips: use a fine-tipped artist's brush and feather the edges of the touch-up area outward to avoid a defined patch edge. For larger areas, it is usually better to repaint the entire door or drawer front rather than blending in a mid-panel touch-up.
How to touch up paint on kitchen cabinets and get a genuinely invisible result is difficult which is why saving a small jar of the original paint from day one of the project is one of the best things you can do for yourself.
How Long Does It Take to Paint Kitchen Cabinets?
This is one of the most searched questions for a reason it is something almost everyone underestimates.
How long does it take to paint kitchen cabinets depends on kitchen size, number of coats, and application method. A realistic honest breakdown:
Day 1: Remove doors and hardware, clean all surfaces, fill imperfections 4 to 6 hours
Day 2: Sand everything, wipe down, apply two coats of primer with dry time between
Day 3: Light sand between primer coats, first topcoat on cabinet boxes and frames
Day 4: First topcoat on all doors and drawer fronts, second topcoat on boxes
Day 5: Second topcoat on doors, light sand, touch-ups, reassembly
How long to paint kitchen cabinets realistically is four to seven days for a medium-size kitchen done properly. How hard is it to paint kitchen cabinets yourself? The skill ceiling is moderate the real challenge is the patience to respect dry times and do the prep thoroughly. How difficult is it to paint kitchen cabinets at a professional level without a sprayer is the bigger question and the answer is: achievable, but it takes more coats and more care than most guides suggest.
How Much Does It Cost to Paint Kitchen Cabinets?
Cost is one of the most important factors homeowners weigh, and the range is wide enough to warrant a real breakdown.
DIY Cost
How much does it cost to paint kitchen cabinets yourself in a typical average-size kitchen (20 to 30 cabinet doors) runs between $200 and $600 in materials primer, paint, sandpaper, brushes or roller kit, degreaser, and wood filler. Budget $60 to $80 per gallon for a professional-grade waterborne alkyd rather than $25 to $30 for basic latex. The paint quality difference shows up years later.
How many gallons of paint to paint kitchen cabinets: most average kitchens need two to three quarts of topcoat per coat when brushing. Two coats means four to six quarts total. How many gallons to paint kitchen cabinets when spraying runs slightly less sprayers apply more efficiently. Round up rather than down; running short mid-project with a colour that is batch-matched is a problem.
Professional Cost
How much does it cost to have kitchen cabinets painted professionally: the typical range in most markets is $1,200 to $3,500 for the full job. How much does it cost to paint kitchen cabinets professionally varies based on the number of doors, complexity of profiles, and whether spraying or brush-and-roll is specified.
How much does Home Depot charge to paint kitchen cabinets: they offer installation services through third-party contractors with pricing that varies by region. Independent local professionals often offer more competitive pricing with stronger personal accountability for the result.
How much to paint kitchen cabinets a quick reference:
DIY (materials only): $200 – $600
Professional, smaller kitchen: $1,200 – $1,800
Professional, larger kitchen: $2,000 – $3,500+
How much to paint a kitchen cabinets door professionally (standalone): $25 – $60 per door depending on profile complexity
How much does it cost to paint kitchen cabinets white tends to run slightly higher on the professional side due to additional coats. How much to paint kitchen cabinet doors only (without the boxes) is proportionally less doors are the visible surface but represent roughly 60 to 70 percent of the total painting work.
How much to charge to paint kitchen cabinets if you are a contractor: industry rates typically sit between $35 and $60 per door for brush-and-roll application and $50 to $80 per door for sprayed application, plus materials. How much to charge for painting kitchen cabinets in competitive markets should factor in your travel time, masking time, and whether you are supplying the paint.
For a full cost picture in the context of a broader kitchen update, our guide oncost to replace kitchen countertops provides a realistic breakdown of where budget typically goes across the full scope of a kitchen refresh.
How to Make Oak Kitchen Cabinets Look Modern Without Paint
Not everyone wants to paint. If you have solid oak cabinets and want a more contemporary look without covering the wood, there are several effective approaches.
How to make oak kitchen cabinets look modern without paint: swapping out hardware for matte black or brushed nickel pulls makes an immediate dramatic difference. Replacing just the doors keeping the original boxes with a flat-slab or Shaker profile gives a cleaner, more contemporary silhouette. Adding a light glaze or whitewash treatment over the existing stain softens the orange tones in red oak while keeping the natural wood character visible.
Updating countertops, backsplash, and lighting around unchanged oak cabinets is often the most cost-effective route to modernising the overall feel. The eye reads the whole room, not just the cabinets in isolation.
How to Paint Unfinished Kitchen Cabinets
Unfinished cabinets are in some ways the easiest to paint there is no existing finish to fight but they do require a specific approach.
How to paint unfinished kitchen cabinets: sand all surfaces with 120-grit to remove mill marks and rough spots, then 180-grit for a smooth final pass. Apply a wood conditioner if working with cherry or maple, which can absorb stain blotchily. Use two coats of primer the first will raise the grain slightly sand lightly with 220-grit after the first primer coat, then apply the second. Proceed with your topcoat system normally.
Unfinished cabinets absorb primer aggressively on the first coat, so do not try to build coverage in one pass. Let the primer seal the wood across two applications for a properly closed surface before topcoating.
Painting vs. Full Cabinet Replacement: When Each Makes Sense
Painting is the right answer when your cabinet boxes are structurally sound, your layout works, and you are after a cosmetic refresh. It is also the right answer when budget is the constraint painting costs roughly 10 to 20 percent of full cabinet replacement.
Replacement makes more sense when the boxes are damaged, the layout is inefficient, or you want different dimensions, configurations, or features like deep drawers, pull-outs, or custom sizing. Many Middle Tennessee homeowners find that a well-executed painted refresh buys them several more years before they are ready to invest in a full custom kitchen.
If you are starting to think beyond paint and toward a broader kitchen project, ourkitchen remodel before and after photos show real transformations that give a true sense of what is possible. And ourcustom kitchen design services page explains how SH Design Woodcraft approaches the full design and build process.
Pro Tips Most DIY Guides Leave Out
After working on kitchens across Middle Tennessee for years, here are a few things that rarely make it into generic guides but make a real difference in the finished result:
Paint the inside edges of door openings the frames visible when doors are open before the doors themselves. They are easy to forget and look sloppy when left unpainted.
Let oil-based primer dry a full 24 hours before topcoating, not just the minimum cure time on the label. Kitchens are humid environments and moisture slows cure.
Use a light at a raking angle when checking sanded surfaces before priming it reveals scratches and imperfections that normal room lighting hides completely.
Do not store leftover cabinet paint in the garage if you live somewhere with cold winters. Latex and waterborne alkyds are destroyed by a single freeze.
Cabinet paint typically reaches full hardness in 7 to 30 days depending on the formula. Treat surfaces gently in the first two weeks even after they feel dry to the touch.
How to Update Kitchen Cabinets Without Painting
If you want change but are not ready for the commitment of a full paint job, the highest-impact no-paint moves are: replacing hardware entirely, adding under-cabinet lighting to shift the feel of the space, replacing just the doors on existing boxes, and updating the countertops and backsplash. These changes work alongside existing cabinet finishes and can dramatically shift how a kitchen reads without a drop of paint.
Professional Kitchen Services Across Middle Tennessee
If you are in Middle Tennessee and exploring a kitchen cabinet update whether it is painting, refacing, or a full custom kitchen build SH Design Woodcraft serves homeowners throughout the region. Reach out to the team closest to you:
Whether you are figuring out how to prep kitchen cabinets for painting on your own or are ready to explore afull kitchen design consultation with a team that knows Middle Tennessee, SH Design Woodcraft is here to help you make the right decision for your home and your budget. Get in touch today.